


Please Leave Us A Message
Privacy statement: Your privacy is very important to Us. Our company promises not to disclose your personal information to any external company with out your explicit permission.

 August 15, 2019
Construction and installation method of warm steel mesh sheet for Steel Wire mesh construction
The role played by Wire Mesh in the floor heating project: 1. It is easy to install the pipe and the construction speed is faster. The pipe is fixed above the wire mesh. 2. It can enhance the carrying capacity of the roof and avoid the occurrence of undesirable phenomena such as cracking, cracking, and collapse of the ground. 3, the heat conduction performance of the steel wire mesh is very good, it can promote uniform heat dissipation. 4. The most important point is insulation and crack prevention. Steel wire mesh is a kind of insulation and crack prevention material in construction projects. The construction effect is very good and has always been trusted by the construction industry. Since the steel wire mesh has such an important role, then let's take a look at the construction and installation method of the floor heating wire mesh.

(I) Grassroots cleanup
Remove debris from the floor, use a floor cleaner to clean the ground surface of the floor, paint the residual mortar, etc., remove dirt from the ground layer after cleaning, then moisten the water, check the residual mortar in the base layer, etc., and remove the clean steel wire. Brush and tweezers brush, remove the mortar skin and ash layer, if there is oil pollution with 10% of the fire alkali solution brush off the oil on the grassroots, and rinse with water in time alkali solution, grassroots residual mortar and other cleanup is The important work to prevent emptying of the screed must be removed before proceeding.
(b) Construction of the screed
1. According to the marked line of the height of the building ground leveling layer that pops up, do ash cakes around the ground, with a spacing of 1.5m-2m plus chin, when there is a floor drain or slope requirements, the slope should be made as required.
2. Lay the cement mortar and apply a 1:0.5 prime cement mortar layer before the shop. Use a wooden trowel to pat the shop. Use a wooden bar to apply the ash cake and smashed the steel bars to level off the trowel. , and then smooth it with an iron trowel.
3, after flattening the head all the time, the cement mortar ground condenses to people stepping on footmarks but not sags, with iron trowel pressed the second time. No pressure is required, and the upper surface is flat and lighted.
4, before the final condensation of mortar for the third time calendering, the feeling is that the trowel smear no longer trowel, with an iron trowel to the second pass of pressure when leaving the trowel flattening, compaction, The calenders achieve the degree of livelihood.
5, 24 hours after surface crushing, sawing sawdust sprinkling water conservation, to keep moist, curing time of not less than 5d, pay attention to the weight and collision during maintenance is not allowed.
(C) Polyurethane Waterproof Coating
1. Primary treatment: Brush the basecoat with an oil brush and apply it evenly to complex parts such as yin and yang angles and pipe roots, and then apply a short area of roller brush to a large area. More than 5 hours after application, the next process can be carried out. Polyurethane coating waterproof coating should be used with the distribution, the best preparation of the mixture is best used within 2 hours.
2, coating construction: brush with a long handle has been equipped with good paint in accordance with the first high after the first, followed by the first near the order to brush. The coating should be applied after the previous coating is cured. The finger is used as the standard. It usually takes 4 hours to cure and the brushing direction must be perpendicular to the previous brushing direction. After the coating is applied on the next coat, it is necessary to carefully check whether the pre-pass coating has empty drums, air holes, and poor curing. The last time survival should strictly control the thickness of the polyurethane coating waterproof layer, it should ensure uniform coating.
(d) Laying of insulation
Laying 20mm thick polystyrene board and laying 0.2mm thick vacuum aluminized polyester film. The insulation layer should be laid flat and tightly lapped. Except for the plastic staples that fix the heating tube on the thermal insulation layer, there must be no other damage.
(five) Installation of the water collector
It should be perpendicular to the ground and firmly fixed to the wall. The height of the riser shall not be less than 150mm, not more than 700mm, and the installation position of each distributor shall be the same. The pipe section from the beginning of the heating pipe to the end of the pipe from the end of the heating pipe to the branch connection of the manifold shall be located in a rigid casing. The casing skin should not exceed the projection surface of the skin of the assembly device. The connection between the heating pipe and the branch valve of the assembly device shall be a dedicated plug-in connector. Heating pipes start at the end, lead at the end and lead to the centralized place where the collection device is introduced, or where there is a large density of pipe laying. When the pipe is less than or equal to 100 mm, heat insulation measures such as flexible casing should be provided. Heating pipes start at the end, lead at the end and lead to the centralized place of the collection device or other pipes where the density is densely laid. When the pipe spacing is less than or equal to 100mm, flexible casing and other insulation measures should be provided. After the heating pipe and the heat medium collection device are firmly connected, or after the curing period of the filling layer, each water circulation loop of the heating pipe should be flushed one by one until the water becomes clear.
(VI) Laying of cryogenic pipes (coil)
1. Prepare PERT oxygen-barrier pipe according to the design requirements.
2. Use a special scissors to break the tube, the fracture should be flat, and the section is perpendicular to the axis of the tube. The bending radius of the heating tube should not be less than 8 times the outside diameter of the tube.
3. Each loop is a pipe. PERT oxygen-proof pipe and pipe are not allowed to have joints during installation.
4. When installing the coil from the manifold, use a special pipe clamp to fasten the PERT pipe directly on the polyphenyl board or tie the heat pipe to the wire laid on the surface of the heat insulating layer.
5. PERT anti-permeation tube pipe fixed point spacing, straight pipe section is set every 500mm, curved pipe section should not be greater than 300mm.
6. The PERT oxygen-proof tube is exposed from the ground to the pipe section of the water separator, and a plastic snake skin casing is provided to prevent local light aging.
7. Except for special requirements such as toilet doors and expansion joints, the coils shall be covered with plastic snakeskin casing.

(seven) pressure test
After the completion of the two pressure test according to design requirements. The pressure medium is clean water, and the pressure tool is a simple pressure pump.
(1) The pressure is applied to the coil system after it is installed for the first time. That is, each loop of the manifold and water collector system is connected and pressured, and the pressure is tested with a gauge pressure of 0.6 MPa so that the pressure does not leak and the pressure drop within one hour does not exceed. After 0.05MPa is qualified, the supervisor shall sign the contractor to fill the concrete with pressure.
(2) The pressure is applied to the coiled concrete after solidification for the second time. With 0.6 MPa gauge pressure test, with no leakage and an hour pressure drop does not exceed 0.05 MPa as qualified, in detail to make a good record of pressure records. After the supervision of the supervisor, the civil construction and installation parties completed the transfer in the signed form.
(3) Hydrostatic test procedure
1. Slowly fill the water through the water separator and discharge the air in the pipeline at the same time.
2. After filling with water, perform a watertight inspection.
3. Use a manual pump to slowly pressurize. The boost time should not be less than 15 minutes.
4. After boosting to the specified test pressure, stop the pressurization and adjust the pressure for 1 hour to observe whether there is any water leakage.
5. Regulator, after 1h, make up pressure to the specified test pressure value, the pressure drop within 15min / within 0.05MPa, no leakage is qualified.
(8) Construction of fine stone concrete filling layer
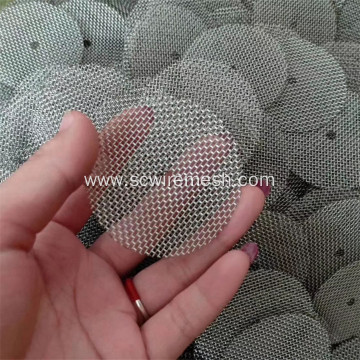
A 40mm thick fine-grained concrete protective layer is used for the floor-heating filling layer, and 15# wire mesh sheets are arranged up and down.
1. According to the mark line of the height of the building ground surface that pops up, gray cakes are made around the floor with a spacing of 1.5m-2m plus a punch, and a room with a floor drain has to make a 1% drainage slope around the floor drain.
2, laying fine stone concrete, coagulation using C15 fine stone concrete, slump should not be greater than 220mm, after laying fine stone concrete with a long bar flat, vibrating compaction, the surface of the collapse of the application of fine stone concrete fill, and then Scrap the bar once and wipe it flat with a wooden trowel. In order to reduce ground heating cracks, when the area exceeds 30m2 or the long side exceeds 6m, the filling layer shall be provided with an expansion joint with a width of 20mm, and the extrusion shall be filled with a 20mm thick extruded plastic strip. Filling layer and wall, column junction, filled with thickness 20mm thick extruded plastic strips. Filling layer and the corner of the wall junction, door opening edge, filled with thickness 20mm thick extruded plastic strips. The 15th wire mesh sheet is set in the filling layer, and the steel wire mesh sheet is laid before the filling layer is filled with concrete, and the steel wire mesh sheet is arranged in the concrete casting process so as to be located about 2 cm below the surface.
3, the first time the pressure, with iron wipe gently press surface layer, flatten the footprints.
4. After the second time, when the surface layer begins to condense and there is a footprint on the ground surface but does not subside, use the iron trowel for the second time to apply pressure. Be careful not to leak pressure, and the surface layer pits, trachoma and Flattened footprints.
5, the third time the pressure, the local people on the surface with slight footprints, and wipe without trowel, with the iron trowel for the third time the pressure, the third time the pressure is slightly larger, will wipe The sub-patterns are smoothed and calendered. The time for calendering should be controlled before final coagulation.
6, conservation, after the ground to live for 24 hours, timely and full of wet sawdust conservation, after the watering twice a day, continuous conservation for 7 days.
(9) Commissioning of low-temperature hot water floor radiation heating systems without commissioning is forbidden.
If there is a heating condition, the commissioning shall be carried out during the completion acceptance stage. If there is no heating condition, the commissioning may be postponed after consultation with the project owner. The commissioning work is carried out by the construction unit in cooperation with the project using unit. During the initial commissioning, the temperature should be raised gradually. The temperature of the water supply should be controlled within 25~30°C for 24 hours, and then the temperature should be raised no more than 5°C every 24 hours until it reaches the design water temperature. The commissioning process shall continue to heat continuously for 24 hours under the conditions of the designed water temperature, and adjust the water temperature of each water circulation loop to reach the normal range.
(10)Bathroom polyurethane coating brush, after the indoor construction process is basically completed
Brushing the bathroom surface polyurethane waterproof. The brushing method is the same as above. After the brushing is completed, the water is filled and the depth of the water is 20~30mm. The water is stored until the room is completed.
The construction and installation methods of steel wire mesh are introduced here, and we hope to help everyone. If you want to know more related information, you can pay attention to this website information.
Warm to install the floor heating pipe leaking warm leak water warm wood floor floor heating cleaning
The above is the Construction and installation method of warm steel mesh sheet for steel wire mesh construction we have listed for you. You can submit the following form to obtain more industry information we provide for you.
You can visit our website or contact us, and we will provide the latest consultation and solutions
Send Inquiry
Most Popular
lastest New
Related Products
Send Inquiry
About Us
Related Products List
Contact Us

Privacy statement: Your privacy is very important to Us. Our company promises not to disclose your personal information to any external company with out your explicit permission.
Fill in more information so that we can get in touch with you faster
Privacy statement: Your privacy is very important to Us. Our company promises not to disclose your personal information to any external company with out your explicit permission.